Ubuntu provides several methods to automatically install Ubuntu on systems. This article will describe the method with an Autoinstall file to automatically make the base setup of the system.
Introduction
When setting up VMs based on Ubuntu, I often go through the same setup steps. Naturally, I do this with Ansible. However, there’s a bit of a chicken-and-egg scenario: to manage the system with Ansible, a defined user must exist, along with an SSH key.
Since I don’t want to do this manually either, I’ve explored my options. Ubuntu primarily offers two possibilities:
- Cloud-Init
- Autoinstall
Cloud-Init
The first option is a standard supported by many distributions. However, it offers limited control. Additionally, it requires the special cloud image of Ubuntu because the normal version is a live system, and Cloud-Init configures the live system—not the system being installed. Therefore, this option is not suitable for me.
Cloud-Init can pull its configuration locally from an ISO image or USB stick, or alternatively from a web server via HTTP(S).
Autoinstall
The autoinstall variant uses a YAML file describing the installation. It succeeds the debian-installer preseeding (also know as d-i), which is more structured and understandable.
This file is searched for during the installation of Ubuntu in the following order:
- Kernel command line
- Root of the installation system
cloud-config(provided by Cloud-Init)- Root of the installation medium (ISO)
For my purposes, I use Autoinstall. However, since I don’t want to modify the original ISO, I opt for a combination of Cloud-Init and Autoinstall: the effective settings are predefined by the definitions using Autoinstall, and these settings are injected into the installation medium via Cloud-Init.
Solution
Thus, the workflow for creating a VM looks like this:
- Create Cloud-Init ISO with the desired Autoinstall settings
- Create the VM in Proxmox
- Attach the installation ISO
- Attach the Cloud-Init ISO with the Autoinstall configurations. Please note that this is not the Cloud-Init functionality proxmox provides in the GUI; see below how to create the ISO image.
- Start the VM The installation will start and fetches the config data from the Cloud-Init ISO. There is only one confirmation prompt presented to prevent accidently overwrite of a productive system.
Create Cloud-Init ISO
Basically Cloud-Init consists of two files which have to be in place:
meta-data(is just empty)user-data(contains a specific section with Autoinstall data) With those two files an ISO has to be generated. This ISO needs to have a specific label so it is recognised as a Cloud-Init media. The label must becidata.
First switch to you directory where ISO images are stored. This because we want to create the required files there. In my case this looks like (my Storage Id is ISOimages):
cd /mnt/pve/ISOimages/template/iso
Now just create the empty meta-data file:
touch meta-data
Finally create the file user-data. This file is just the container for our Autoinstall section and looks like:
#cloud-config
autoinstall:
  version: 1
  locale: en_US
  keyboard:
    layout: ch
  identity:
    hostname: ubu24-template
    realname: 'Ansible user Installation User'
    username: ansible
    password: '$1$3quHna4W$OfxWognRhsgMw8o1AhLMt/'
  storage:
    layout:
      name: lvm
      sizing-policy: all
  ssh:
    install-server: yes
    authorized-keys:
      - ssh-ed25519 AAAAC3NzaC1lZDI1NTE5AAAAIAJyyp6xjVsfMyQUU8ONgn8HUUTo4iDvRIOQR9Jp51e3 ansible@sekureco42.ch
    allow-pw: no
  packages:
    - qemu-guest-agent
  late-commands:
    - echo 'ansible ALL=(ALL) NOPASSWD:ALL' > /target/etc/sudoers.d/99_ansible
    - sed -i 's/#Port 22/Port 8022/g' /target/etc/ssh/sshd_config
Some explanation:
password: This is the hashed password. You can get it by callingopenssl passwd; you will be prompted for a password and you will get the hash you have to set forpassword.sizing-policy: all: I want to use the whole physical volume for the logical root volume (no reserve).authorized-keys: Will be put into your ssh configuration of the specified user. The goal for me is to have key authentication in place instead of password authentication. You can omit this value but you have to make sure that you also omit the keyallow-pw.allow-pw: no: This means that no password authentication is allowed. With this in place you are only able to login to your system with the corresponding private key of the public key you specified above.packages: defines which additional Ubuntu packages should be installed. In my opinion on Proxmox the packageqemu-guest-agentis essential.late-commands: Specify what should be done before the systems finishes the installation. In my case I want to issuesudowithout password (due the fact I typically do not know it because I’m using key based authentication). Additional with the second line I adjust the listen port of the SSH daemon to listen on port8022instead of the well known port22.
Finally you have to create the ISO file:
mkisofs -V cidata -lJR -o cloud-init.iso user-data meta-data
Create VM in Proxmox
That’s the easiest part. Just create your VM as usual - but add a second CD drive to your VM and use the created ISO cloud-init.iso. A possible VM definition could look like:

cloud-init.iso
After you created your VM power it on. The installation will start. After a short time it will ask you for confirmation:
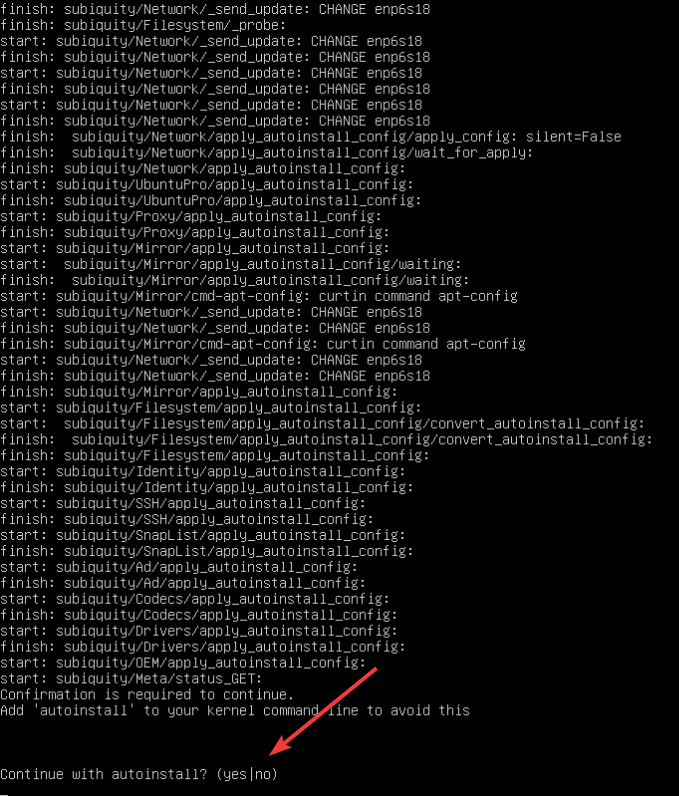
If you reach this prompt just enter yes to confirm. The installation will proceed. In the meantime remove the Ubuntu 24.04 ISO image so it will not boot from it the next time.
After a reboot you should be able to login with your newly defined user and changed SSH port, eg:
ssh -l ansible -p 8022 -i ~/.ssh/my-private-key ubu24-template
Further Reading
Here are some links:
- Ubuntu Autoinstall Introduction: https://canonical-subiquity.readthedocs-hosted.com/en/latest/intro-to-autoinstall.html
- Ubuntu Autoinstall Reference: https://canonical-subiquity.readthedocs-hosted.com/en/latest/reference/autoinstall-reference.html
- (Update from 07.05.2024) Ubuntu in LXC Container on Proxmox with Cloud Init: https://github.com/UntouchedWagons/Ubuntu-CloudInit-Docs
- (Update from 07.05.2024) Ubuntu Installation on Proxmox with Packer: https://www.virtualizationhowto.com/2024/04/proxmox-packer-template-for-ubuntu-24-04/